php手把手教你做网站(十九)vue自动上传图片,拖动排序
实现目标:
- 可以一次选取多个图片上传;
- 上传的图片可以拖动排序;
- 点击图片提示删除弹窗,确认后删除该图片;
- 点击上传按钮图标,即可浏览图片,隐藏选择文件的文本框;
- 选择图片以后自动上传;
- 拖拽排序的时候使用transition-group,实现动画效果;

图1 多图上传效果
1、html代码
相关多图
-
-
说明:可以拖动改变顺序
说明:
@click=”del(index)” 点击删除图片 index为数组的索引 点击的是第几个图片
@mouseover=”showzz(1,index)” 鼠标放到上边 出现遮罩层 垃圾桶
@mouseleave=”showzz(0,index)” 鼠标离开 遮罩层消失
@dragstart=”drag($event,index)” 以下三个 用于拖拽排序
@drop=”drop($event,index)”
@dragover=’allowDrop($event)’
draggable=”true” 设置为true 可以拖动
:key=”item” 这里的key 要注意不能等于 index,要不然没有动画效果
img src的属性 是 :src=”item.picpath” 不能是src={{item.picpath}}
上传的选择框设置为display:none隐藏
transition-group用法:
2、js代码
 new Vue({
    el: '#app',
    data(){
		  tagslist:[
		    '网站开发',//存放的标签
			  '网站建设'
		  ],
		  tagsdt:"",  //绑定的标签文本框
		  tagindex:"",//删除标签的序号(索引)
		  listData: [
				  /*
			      {'picpath':'/public/upload/image/20211107/1.jpg',shs:0}

				  shs   显示遮罩层 ,垃圾桶删除标志,0  不显示   1显示
				  */
		  ],
      file:"file",      //用于切换 file  text  实现同一个图片可以连续上传
		  tis:'',           //提示内容
		  showzzc:0,         //弹出框的显示,隐藏 。0 隐藏  1显示
		  showts:0,          //1 弹出提示操作框  2 弹出提示确认框
		  lisindex:"",      //记录图片的索引
		  datameth:""       //根据这里的参数操作不同的方法
		 }
    },
    methods:{
	  tags:function(){
		  if(this.tagsdt){
		      this.tagslist.push(this.tagsdt);
		  }
		  this.tagsdt="";
	  },
	  deltag:function(f){
		  this.showzzc=1;
		  this.showts=1;
		  this.tagindex=f;
		  this.datameth='tag';
	  },
	  hidetc:function(){
		  this.showzzc=0;
	  },
 	   del:function(key){
			this.showzzc=1;
			this.showts=1;
			this.lisindex=key;
			this.datameth="delpic";
			//this.listData.splice(key, 1);
		},
	  isdelc:function(){
			if(this.datameth=="delpic"){
		        this.listData.splice(this.lisindex, 1);
			}
			if(this.datameth=="tag"){
		        this.tagslist.splice(this.tagindex, 1);
			}
			this.showzzc=0;
	  },
  	showzz:function(meth,key){
			//console.log(this.listData[key].shs);
			if(!this.listData[key].shs){
			    this.$set(this.listData[key],'shs',0);
			}
			this.listData[key].shs=meth;
	  },
	  upbtn:function(){
		  document.getElementById("multiple").click();
	  },
	  autoup:function(){
		  let that=this;
      that.file="text";  //切换text  file
		  let ups=document.getElementById( "multiple");
		  let formdata = new FormData();
		  if(ups.files[0]){
			  if(ups.files.length>4){
				  this.showzzc=1;
				  this.showts=2;
				  this.tis="一次最多可以选择4张图片上传!";
          that.file="file";
				  return false;
			  }
        for(m=0;m
注意:上传图片以后一定要that.file=”file”,切换回file,不然会出现只能上传一次,下次选择当前图片不能上传的情况。
- 去掉js中的for循环和html的multiple=”multiple”选择多个图片,就是单图的上传;
- 因为删除弹出提示的地方有2个,实际可能更多,在点击确认的时候不知道操作哪个删除,所以点删除图片或者是点删除信息标签的时候,向datameth赋不同的值,这样我们点击弹窗的确认,读取datameth的值,使用if判断,就可以知道要删除图片还是删除标签;
- 上传图片,删除图片用到的弹窗,在前边十七章有说明;
上边的上传是选取多个然后for循环逐个上传的,也可以file使用数组file[]批量提交,如下:
for(m=0;m
但是这样做的话,后台使用
 foreach($_FILES as $k=>$v){
}
得到的$v[‘name’]就是数组,需要我们再次for循环,得到单个的图片信息,返回以后的信息因为是数组,push只能一次追加一个,就只能再次循环,感觉很麻烦还不如开始就循环,一个一个的上传。
3、信息标签html
信息标签
点击标签可以删除
输入文本框绑定tagsdt,当我们鼠标离开该文本框的时候,通过blur使用tags方法读取绑定的tagsdt,可以获得输入的内容,这里需要判断是否为空,如果不为空再push进数组:this.tagslist.push(this.tagsdt);
4、php后端代码
 foreach($_FILES as $k=>$v){
       $v['name'],$v['size'],$v['tem_name']
  就是图片的基本信息,使用move_uploaded_file移动到指定文件夹
  			$imags['picpath']=$path;
				$imags['shs']=0;
}
exit(json_encode(array('error'=>'0000','pic'=>$imags),JSON_UNESCAPED_UNICODE));
move_uploaded_file用法:
当前文件:$v[“tmp_name”],
目标文件:ROOT_PATH.$images_dir.$newname
move_uploaded_file($v[“tmp_name”], ROOT_PATH.$images_dir.$newname);
再次强调上传图片,要验证图片的安全性,防止图片木马!
热门文章
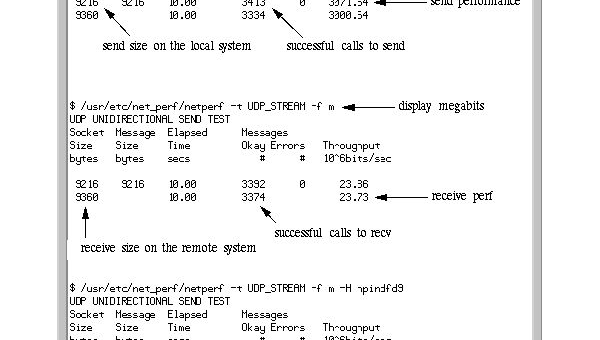
Linux怎样优化网络带宽使用
2025-04-20

如何手工制作台历?简单步骤与创意设计指南
2025-04-19
如何查询他人身份证号码?合法途径与注意事项解析
2025-04-19
Windows防火墙打不开怎么办?全面解决方法
2025-04-14

Linux设置环境变量的方法?linux设置环境变量的命令
2025-04-11
CentOS与Aliyun Linux有什么区别?如何选择最佳方案?
2025-03-24