.NET Core 3.0中WPF怎么使用IOC
目录
推荐阅读
-
Web应用从零开始,初学者友好型开发教程
-
容器化最佳实践:Docker 与 Kubernetes 在微服务架构中的协同设计
-
AWS Cloud9 使用攻略:云端 IDE 如何无缝集成 Lambda 与 S3 服务?
-
Heroku vs AWS Elastic Beanstalk:快速部署 Web 应用的平台对比
-
Kubernetes 集群部署避坑:资源调度、服务发现与滚动更新策略
-

Docker 镜像优化指南:分层构建、瘦身技巧与多阶段编译实践
-
Postman 接口测试全流程:从 API 设计到自动化测试脚本编写
-

pytest 框架进阶:自定义 fixture、插件开发与持续集成集成方案
-
JUnit 5 新特性:参数化测试、扩展模型与微服务测试实践
-
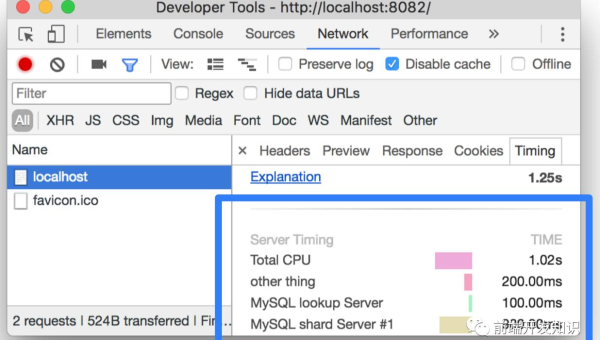
Chrome DevTools 性能分析:FPS 监控、内存快照与网络请求优化指南